Remote Server Using SSH
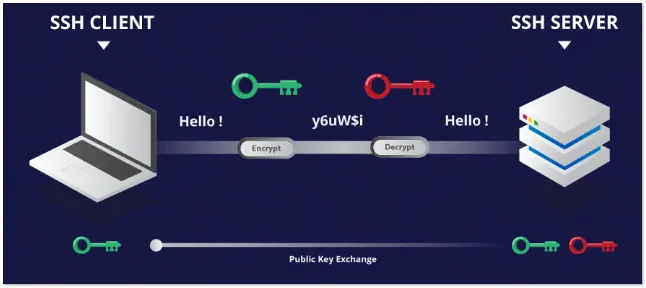
What is SSH ?
Why Use a Remote Server or Cluster Instead of a Laptop?
The server or cluster (the combinations of multiple servers (nodes)) that will allow to scheduled and executed parrallel tasks, sharing the resources via network. Running computational workloads on a remote server or cluster is essential for performance, scalability, and reliability.
Remote Server: Setup openssh-server service
To allow access from a client (your local laptop) to the remote server, you need to install the SSH server and client.
For Debian-based OS, use the following software via the SSH protocol, ensuring all data is encrypted and decrypted:
openssh-server: Install this on the remote machine. It stores authorized user information (passwords and public keys). When a client attempts to connect, it verifies the credentials to allow authorized users access.openssh-client: Install this on your local machine. It sends authorized user information (passwords and private keys). If the credentials match, the user is allowed to log in.
- If your remote server is not on a public network (WAN), it can still be accessed within a local area network (LAN).
- If you have administrative permissions on your wireless router, consider using DDNS and port forwarding to allow access from outside the LAN.
- Testing purpose: You can use your local machine, or a container service to install both server and client services. For your real remote server, replace it with
locahost
1. Install the SSH Server
For testing purpose, you can install on your local debian OS machine
docker run -it ubuntu:20.04 bash
On your remote server, install openssh-server:
sudo apt update && sudo apt install -y openssh-server
2. Enable and Start SSH Service
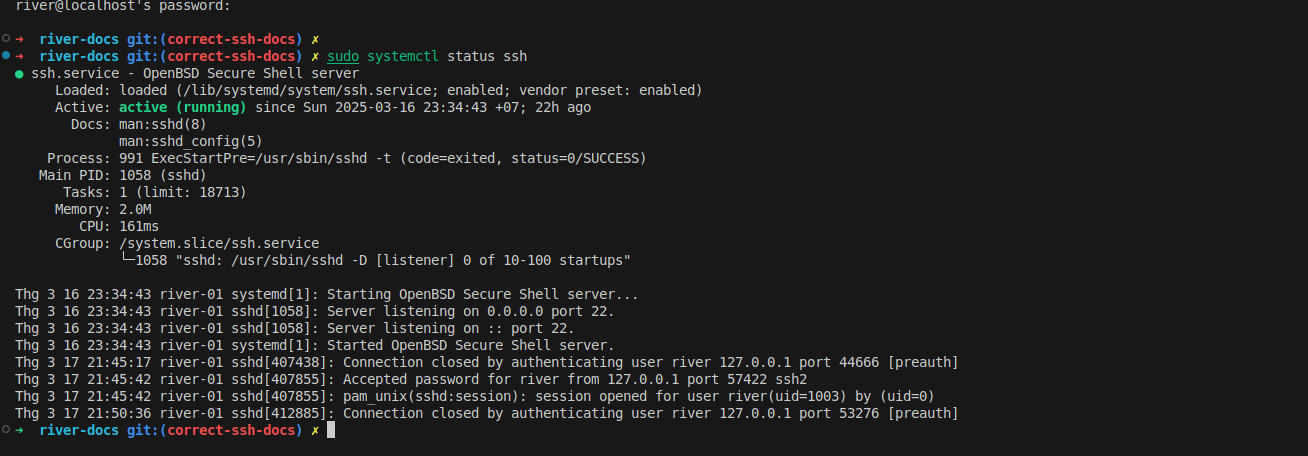
Check the status of the ssh service
sudo systemctl status ssh
Ensure the SSH service is running and enabled at boot, then start it service now:
# enable at boot, don't need to turn this service again when you restart your remote server
sudo systemctl enable ssh
# start now
sudo systemctl start ssh
# check status
sudo systemctl status ssh
The result should be similared to this
Create a test user, so you can use it later. The username will be "river", while the password will be "password2025"
sudo useradd -m -s /bin/bash river
echo 'river:password2025' | sudo chpasswd
By default, the config for the ssh-server service is not truly safe, we can adjust later on the advanced section. Modify the sshd_config- the open ssh service config,
reload it then it can be reliable for the real world application.
Local Client: Setup openssh-client
1. Install the SSH Client**
On your local machine, install openssh-client. For testing, you can install on the same machine where you install openssh-server:
sudo apt update && sudo apt install -y openssh-client
2. Login via SSH using password
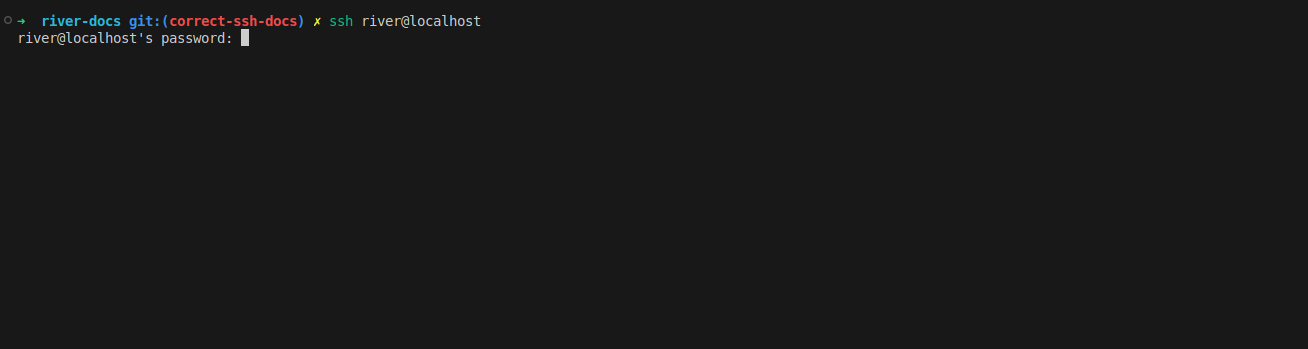
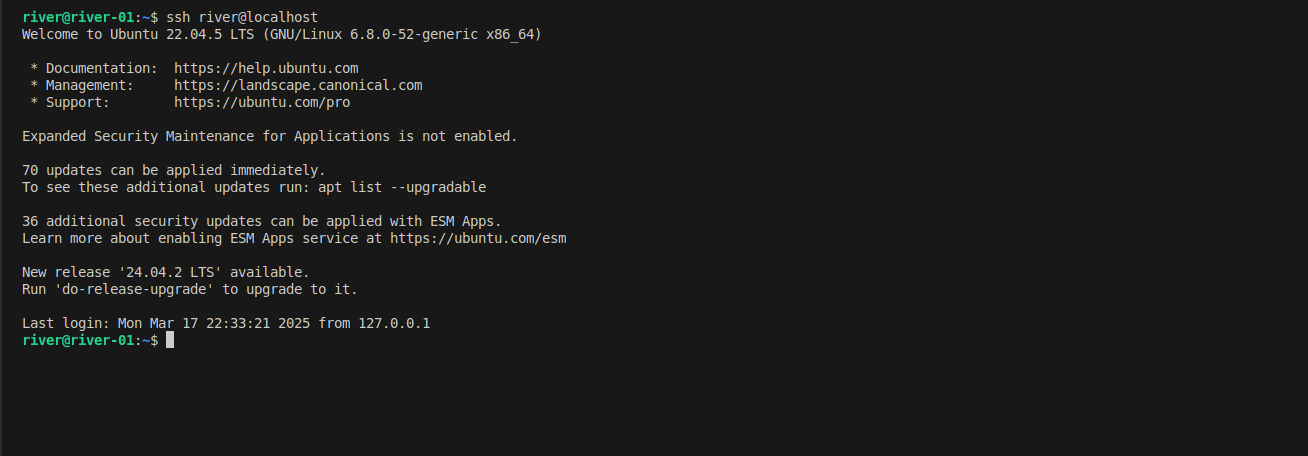
Using the above user, login to it own:
ssh river@localhost
It will ask for the password, just type the above password for user river
3. Login via SSH using rsa key (more secure)
Login using rsa key, you do not need to type password again. This will be an alternative for password authentication. You can login via the SSH protocal using key pair. It will look whether your local private key is a pair with your remove sever public key
Change your user to river, create the key. Press Enter until it finish. There are many more algorithms (just create a pair of string that are matched to each other), for more information, follow here
su river
ssh-keygen -t rsa -b 4096
It will create a key pair that is located on user home folder.
ls -lah /home/river/.ssh
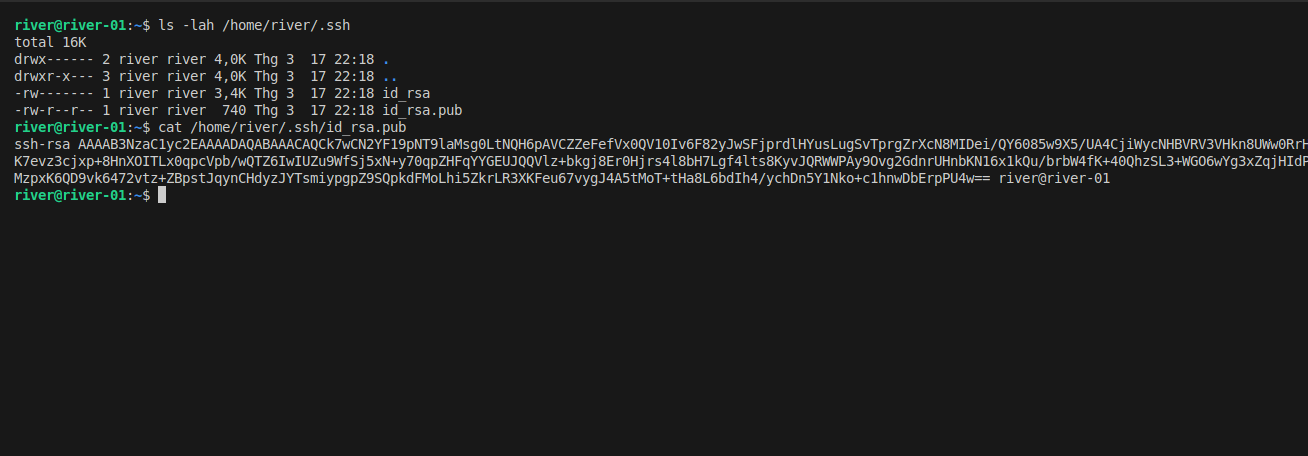
Copy your public key content, login to the remote server again to write into the key files
ssh river@localhost
Create a new file, on ssh server, under the HOME folder;
nano ~/.ssh/authorized_keys
Add your content of the id_rsa.pub to this file. If you have more public keys to access from multiple machine, just append
Logout, and then login again. You will no longer need to type password. By default, it will use your key at ~/.ssh/id_rsa and your relative username at port 22 to authenticate.
For the first time, it will ask to continue connect, allow to make fingerprint on the remote server.
ssh river@localhost
4. Login via SSH using rsa key (more secure) automatically
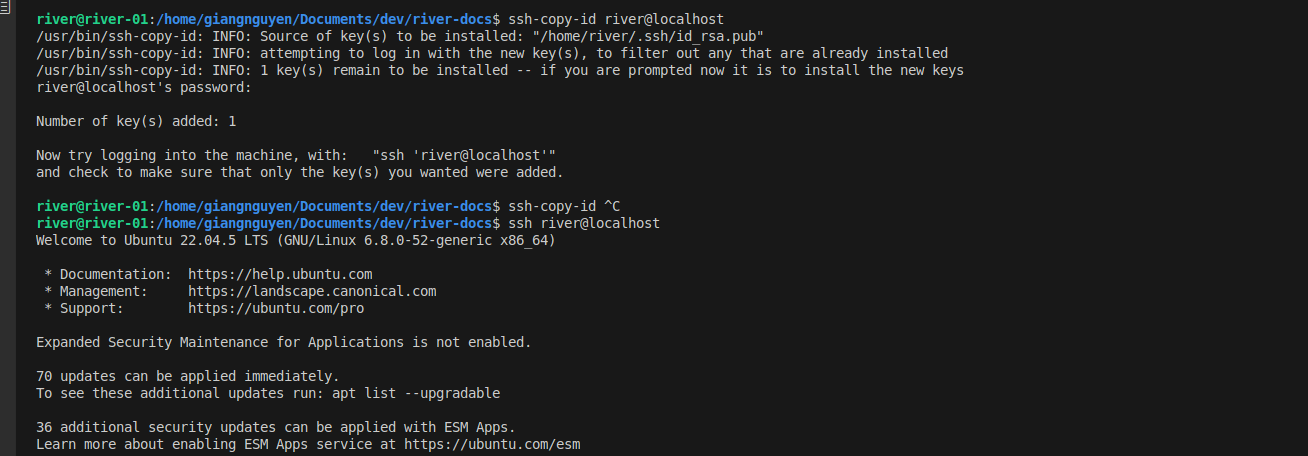
Previously, it takes more efforts to add your pubkey to the remote sever manually. Is there any automation for copying it?
Using the ssh-copy-id
ssh-copy-id river@localhost
5. If you have new device, while you already have a setup for a previous device, copying key manually
On your new device, after generating the new key, copying this key file to your existed key setup device, using scp to copy this to remote server
scp id_rsa.pub river@localhost:/home/river
cat id_rsa.pub >> /home/river/.ssh/authorized_keys
rm id_rsa.pub
Advanced: Set up for real world application
By default, the ssh sever is setup with port 22 by default, and more:
-
Password Authentication Enabled: Allows brute-force attacks where hackers try common and random passwords and usernames until they match.
- 🔧 Fix: Use SSH keys (
PasswordAuthentication no).
- 🔧 Fix: Use SSH keys (
-
Root Login Allowed: Attackers can gain full control.
- 🔧 Fix: Disable root login (
PermitRootLogin no).
- 🔧 Fix: Disable root login (
-
Empty Passwords Allowed: Anyone can log in if a user has no password.
- 🔧 Fix: Disable it (
PermitEmptyPasswords no).
- 🔧 Fix: Disable it (
-
X11 Forwarding Enabled: Can expose your system.
- 🔧 Fix: Disable it (
X11Forwarding no).
- 🔧 Fix: Disable it (
-
No Login Attempt Limits: Attackers can keep guessing passwords. Limiting attempts in a single connection requires more resources to attack your system.
- 🔧 Fix: Set a limit (
MaxAuthTries 3).
- 🔧 Fix: Set a limit (
1. Change the basic ssh config, reload
Using nano to edit your config file
sudo nano /etc/ssh/sshd_config
Install nano editor if you do not have it
sudo apt-get install nano -y
Scroll down, using up/down key, find each of these lines
PasswordAuthentication no
PermitRootLogin no
MaxAuthTries 3
PermitEmptyPasswords no
X11Forwarding no
Reload new config
# restart
sudo systemctl restart ssh
# check status
sudo systemctl status ssh
2. Request users to create their own key
Give the admin the pub key. Highly recommended to use ed25519 algorithm to generate key pair
ssh-keygen -t ed25519
3. The admin helps to copy keys
On the remote machine, the admin copying the user pub key and put to the remote server. Of course, the admin has been added his/her own pubkey.
# example: scp id_rsa.pub <admin username>@localhost:/<admin userhome>
scp id_rsa.pub admin@localhost:/home/admin
ssh admin@localhost
After login, manually do it. The the user can login using key pair after that.
# chane to root to not need type password as sudo permission
sudo su
mkdir -p /home/river/.ssh
cat id_rsa.pub >> /home/river/.ssh/authorized_keys
chmod 700 /home/river/.ssh
chmod 600 /home/river/.ssh/authorized_keys
chown -R river:river /home/river/.ssh
rm id_rsa.pub
4. Why Not Other Setups ?
Besides SSH key authentication, there are other security measures like Fail2Ban and 2FA, but they are not necessary in this setup for the following reasons:
🔹 Fail2Ban
Fail2Ban is useful for blocking brute-force attacks on SSH. However, it is not needed in this setup because:
- Password authentication is already disabled, so brute-force attacks are not possible.
- SSH keys do not allow unlimited login attempts, unlike passwords.
- Additional protection like Fail2Ban only adds unnecessary complexity when SSH keys are used exclusively.
🔹 2FA (e.g., Google Authenticator)
Two-Factor Authentication (2FA) provides extra security, but it is not needed because:
- SSH keys are already highly secure, and 2FA mainly protects password-based logins. If we use the key to authenticate, so the 2FA is no longer needed.
- 2FA requires manual setup for each user, making it less practical in automated or multi-user environments. The QR code should not be shared via unencrypted protocol. Unliked the public key, it is very hard for hacker to get the private key from public key.
- In case of device loss or failure, recovery is more complex compared to SSH key backups.
YOUR LOGIN VIA PASSWORD WILL BE SAFE IF YOU DON'T USE IT
5. Conclusion
By using SSH key authentication and disabling password login, we eliminate brute-force risks without the need for additional security layers like Fail2Ban or 2FA. 🚀
Basic Commands for Remote Usage
Check system resources:
htop   # View CPU & memory usage
nvidia-smi  # Check GPU status (if available)
Transfer files:
scp localfile.txt username@server_address:/path/to/destination
SSH Tunneling**
SSH tunneling can be used to securely forward network traffic. There are two main types of tunnels: remote and local. Replace username and domain with your actual username and the domain of the server.
Remote Tunnel**
A remote tunnel forwards a port from the remote server to your local machine. This is useful when you want to access a service running on your local machine from the remote server.
ssh -N -R 9000:localhost:9999 username@domain
Example Use Case:
You have a Jupyter Notebook running on your remote server at port 9999, then you want to access the it at your local machine at http://localhost:9000
Local Tunnel**
A local tunnel forwards a port from your local machine to the remote server. This is useful when you want to access a service running on the remote server from your local machine.
ssh -N -L 2222:localhost:22 username@domain
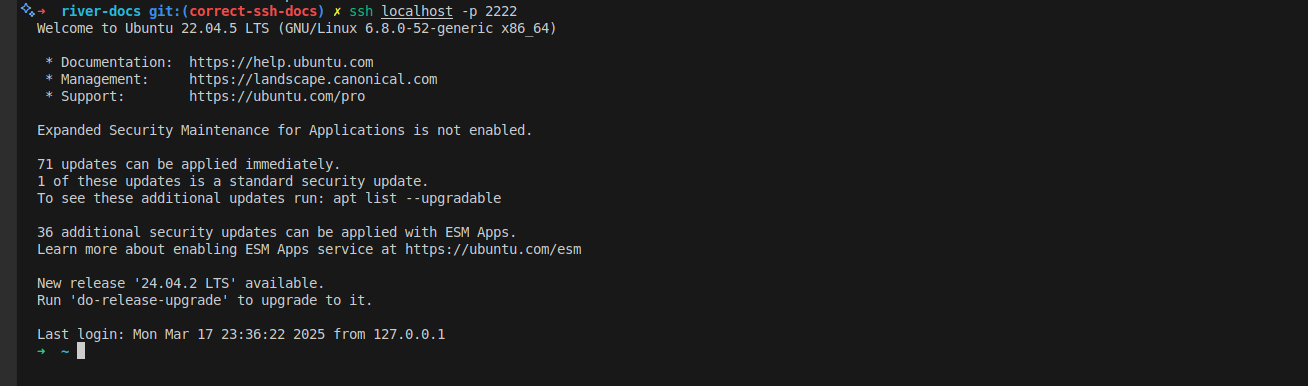
Example Use Case: Ngrok service, it will tunnel the port ssh login to a remote server using a specific port. By using this, you do not need your remote server to be a public network with specific IP. Now you can login the local machine on remote server. Try this to login to your localhost via the port 2222 instead of 22 on it own. By default username will match with your current user.
ssh -N -L 2222:localhost:22 localhost
Open a new terminal
ssh -p 2222 localhost
Conclusion
Using a remote server ensures faster processing, reliable storage, and scalable computing power, making it the best choice for resource-intensive tasks. Always follow best practices for security and efficient resource usage.